29 Maret 2008

Install Tutorial For Wordpress

When I first installed Wordpress, I had a lot of trouble finding information that pertained to the exact problems I was running into. Once I got Wordpress up and running, I realized that it just wasn’t that hard to set up. Since then, I’ve seen numerous people on the Wordpress forums seeking help with the same problems day in and day out.

My web host is 1&1 and I’ve been pleased with the sevice I have. If you don’t yet have a host, 1&1 has packages as low as $2.99/month that has all you need to run a website (even your own Wordpress site) including your domain name. Having said that, 1&1 has their own blog that you can set up through the control panel. This blog is actually a Wordpress blog, but is extremely limited in features and options. I’d recommend going ahead and setting up a database and installing the real thing…………..and I’m going to show you how to do it.

For this tutorial, I’m going to assume that your host is 1&1. You will need the Linux hosted package to have access to MySQL. The first thing we need to do is set up a MySQL database. Log in to the 1&1 Control Panel under the Administration tab, click on MySQL Administration.

install wordpress 1

There you will click “New Database”:

install wordpress 2

1and1 MySQL New DatabaseYou’ll be prompted for a description for your database. just enter something like “blog” or “wordpress” and click “Set Up”. That was easy enough, huh? From there, 1&1 will set up a database for you. Normally, this will take just a couple of minutes. Click on “overview”, and the screen will show you the status of your database, either “setting up” or “ready”. Once it’s in “ready” status, you are ready for the next step.

Next up is to download Wordpress from wordpress.org if you haven’t already. You’ll have to have a utility to unzip the file. I used WinRAR. The only file you’ll need to do anything to before you upload everything is “wp-config-sample”. Right click on the wp-config-sample file and open with Notepad or Wordpad. Here you will fill in your database details from the 1&1 control panel in place of what’s there.

install worpress 3

With 1&1, you WILL need to change the host name from “local host” to the actual host address…………no problem!

Once you enter the details of your database, go to the top left corner of Notepad and click “File”, then “Save As” and rename the file “wp-config.php”.

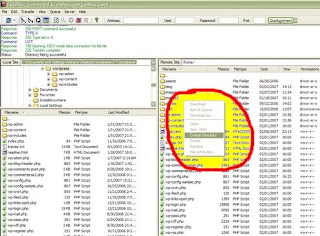
Hang in there, because we’re almost done. You’ve already done the hardest and most confusing part. All that’s left is uploading these files to the server. Wordpress will automatically set up the needed tables on your database. For uploading files, I use Filezilla, which is a free program you can download from filezilla.sourceforge.net. Here you will upload all the Wordpress files to whatever directory you want your blog to be in.

install wordpress 4

If you want Wordpress to be your main site, you would upload the files in to the root directory (index/home/default/etc.). If you would like your blog to be part of an existing site, you would create a directory in the root and upload the files to that directory. AT the time I first wrote this tutorial, I already had a website and wanted my blog address to be www.antbag.com/blog. So I created a directory called “blog” inside the root and uploaded the files there. To create a directory with Filezilla, all you have to do is right click inside the root, and choose “create directory”. It’s really pretty simple.

install wordpress 5

Once you’ve uploaded the files, you’re ready to go to your website and set this thing up! Now open your browser (Firefox, Internet Explorer, etc.), and in the URL address field at the top, type in your site and add “/wp-admin/install.php” to the address (example: www.yoursite.com/wp-admin/install.php or www.yoursite.com/blog/wp-admin/install.php depending on the directory you uploaded the files to). From here, Wordpress will lead you through the rest. Be sure to take special note of the password that Wordpress gives you. You WILL need this to log in. You can easily change it once you’re logged in, but you’ll need it for your first log-in.

I hope this has been helpful to you getting Wordpress set up. Personally, I couldn’t find much information on the subject. There were plenty of tutorials, but not that explained setting up the database and how to get done what needed to be done in the 1&1 Control Panel. Good Luck.

Read More..

Install Tutorial for Apache, PHP, PEAR, MySQL & phpMyAdmin on Windows XP

I’ve had lots of people ask my in the past, how to install PHP, MySQL and Apache for Windows XP. I recently formated my computer, and since I was going to do it, I thought I’d write out how to do this, for anyone who wants to know. My computer has SP2 installed.

Apache Web Server

Download Apache HTTP Server. I downloaded the current stable release, in this case: Apache 2.0.54. So download the Win32 Binary (MSI Installer), double click it, let it install.

PHP Run-time

Download PHP. I downloaded PHP 4.4.0. PHP 5 is the way to go. The tutorial below is pretty much the same, see the comments if you have problems. Unzip the contents, and put it all in the folder C:\php.
Copy the following files into your Apache2 installation directory. In my case it was C:\Program Files\Apache Group\Apache2.

Code:

php4ts.dll
php4apache2.dll
php.ini-recommended

Rename php.ini-recommened to php.ini. Open the php.ini in your favorite editor. Mine is EditPlus.

Search for ‘doc_root’ until you find the line:

Code:

doc_root =

Change this line to (in my case):

Code:

doc_root = C:Program FilesApache GroupApache2htdocs

Go to the directory: C:\Program Files\Apache Group\Apache2\conf\;
Add the following lines to the end of the file httpd.conf:

Code:

LoadModule php4_module php4apache2.dll
AddType application/x-httpd-php .php

In the same file, add index.php to DirectoryIndex — this will make sure index.php will be picked up by the server automatically:

Code:

DirectoryIndex index.html index.html.var index.php

PEAR Extension

PEAR is an extension for PHP. These days PEAR is included with PHP, but you need to install it yourself. I use PEAR on all my PHP developments.

Ok.. Installing PEAR isn’t bad, here is what you do:

Open a command line window (i.e. Start->Run->cmd)
Go to the PHP directory, in my case C:\php. Type go-pear.bat. Follow the instructions.
The PEAR extension get installed in C:\php\PEAR directory.
Once PEAR is installed, go to the php.ini file in your Apache2 directory. Find the

Code:

;include_path = ".;c:phpincludes"

Remove the semi-colon (to un-comment it), and then add C:\php\PEAR to it

Code:

include_path = ".;c:phpincludes;C:phpPEAR"

MySQL DataBase

Download MySQL (runtime) and MySQL Administrator (Admin program). I used MySQL 4.1 Generally Available (GA) release. Download, unzip, and install both.

Testing it all – you really don’t need to, but before testing, restart your computer.

Test Apache Web Server

Once Apache is installed, you should be able to go to your favorite browser, type the following URL: http://localhost/ and have a test page load.

Test PHP

Go to the htdocs folder in Apache2 folder
Create a file called index.php, inside of that file put (be sure to remove the space between the <>

Code:

echo "php installed ok";
?>

Go to your browser, type the following URL: http://localhost/index.php
If everything worked OK, “php installed ok” will appear on the screen.

Test MySQL and PHP using phpMyAdmin

Download phpMyAdmin.
This is the best web based MySQL Administration Tool (vital, trust me).
Unzip the contents into a folder phpMyAdmin in your htdocs folder.
Were going to use phpMyAdmin to control MySQL instead of the command line.
In the phpMyAdmin folder open the config.inc.php and type in the your root password for MySQL:

Code:

$cfg['Servers'][$i]['password'] = 'xxxxx';

Try and run phpMyAdmin in your browser: http://localhost/phpMyAdmin/
You’ll most likely get the error:

Client does not support authentication protocol requested by server; consider upgrading MySQL client

To fix this, do the following:

  1. Start the MySql Administrator, select “Startup Variables” from the menu, select the “Security” Tab. Check ‘Use old passwords’.
  2. Select “User Administration” from the menu, select the root user account and change the password for root user (other than null)
  3. Select “Service Control” from the menu, press “Stop Service” button and then press “Restart Service”.

Go back to config.inc.php and type in the your new root password for MySQL:

Code:

$cfg['Servers'][$i]['password'] = 'yyyyyy';

Try and run phpMyAdmin: http://localhost/phpMyAdmin/ — this should work now.

Test PEAR

Using phpMyAdmin to create a database
In your htdocs folder create a file called testpear.php, in the file put the following (be sure to remove the space between the <>

Code:

 
require_once 'DB.php';
PEAR::setErrorHandling(PEAR_ERROR_DIE);
 
$db_host = 'localhost';
$db_user = 'root';
$db_pass = 'password';
$db_name = 'dataBase_name';
$dsn = "mysql://$db_user:$db_pass@unix+$db_host/$db_name";
 
$db = DB::connect($dsn);
$db->setFetchMode(DB_FETCHMODE_OBJECT);
 
?>

This will use the PEAR DB Extension to create a connection to your database. Before running this file make sure your database details are correct (i.e. name, user, password). Run this file in your browser, if no errors are listed, then your good to go.

Read More..

SEO Tools

Berikut ini tool-tool yang dapat digunakan untuk mengoptimalkan SEO sebuah website :

  • HitTail : Tool ini bertujuan digunakan untuk mengamati kata kunci yang datang menuju website Anda. Dengan menggunakan tool ini diharapkan Anda dapat mengorganisir katakunci-katakunci yang dimiliki oleh website Anda dan Anda akan punya gambaran untuk pengembangan lebih lanjut.
  • Quintura : Tool ini digunakan untuk menggambarkan hubungan kedekatan kata kunci yang anda miliki. Quintura adalah mesin pencari yang dapat menampilkan hasilnya secara visual selain secara standart seperti mesin pencari yang lainnya.
  • Buzz : Tool pencari kata kunci. Tool ini dapat memberikan penjelasan pada Anda siapa saja yang menggunakan kata kunci tersebut.
  • Spider Simulator : Tool ini dapat menjelaskan bagaimana mesin pencari spider (robotnya google) dapat menjangkau website Anda dan Apa yang dapat Anda kerjakan untuk meningkatkan rangking situs Anda di mesin pencari.
  • Google Webmaster Central : Informasi tentang bagaimana Google mencari dan meng-index suatu website
  • SEO untuk Blog dan RSS feed : Tips dan strategi untuk mengoptimalkan blog dan RSS feed Anda

Read More..

Tutorial Install Joomla

Berikut langkah-langkah untuk install Joomla:

  • Ekstrak paket Joomla yang telah Anda download ke C:\Program Files\xampp\htdocs (untuk komputer pribadi yang menggunakan windows), Jika anda ingin menginstall di server hosting Anda, install di direktori root biasanya terleteka di public_html . Di langkah-langkah selanjutnya, dijelaskan langkah-langkah jika menginstall di komputer pribadi, jika Anda menginstall di server hosting sesuaikan dengan direktori root hosting Anda.
  • Rename folder hasil ekstrak dengan nama yang diinginkan, misalkan : workshop
  • Jalankan internet browser, lalu ketik : http://localhost/workshop atau dengan nama domain anda jika diserver hosting.
  • Pre-intallation check : pastikan setiap service server (PHP, MySQL, support Zip,dll) sudah berjalan di komputer Anda, yang ditandai dengan warna hijau. Klik Next
  • License : Klik Next
  • Setting Konfigurasi Database
  • Hostname : localhost
  • MySQL User Name : root
  • MySQL Password : (kosongi saja)
  • MySQL Database Name : workshop (terserah anda, ini untuk nama database nantinya)
  • MySQL Table Prefix : jos_ (sebagai awalan nama tabel di database, ini dapat anda ganti)
  • Drop Existing Tables : Jika dipilih dan jika sebelumnya sudah terdapat database dengan nama yang sama di komputer, maka tabel di database sebelumnya akan dihapus.
  • Backup Old Tables : Jika dipilih maka tabel sebelumnya di database yang sama akan di backup.
  • Install Sample Data : Jika dipilih maka dalam meng-install Joomla akan dikasih contoh data. Jika belum pengalaman dengan Joomla sebaiknya diinstall juga sample datanya, tetapi jika sudah berpengalaman dengan Joomla tidak usah dipilih.
  • Pada site name isi nama website, misal: “Workshop Joomla”. Klik Next
  • Isi Your Email dengan email Anda dan ubahlah Admin Password sesuai dengan yang diinginkan dan mudah diingat. Klik Next
  • Hapuslah folder [installation] pada folder website Anda yang berada di C:\ProgramFiles\xampp\htdocs\workshop\
  • Klik Administration untuk melihat halaman Administrator website atau dengan mengakses di URL: http://localhost/workshop/administrator
  • Untuk melihat hasil website yang telah diinstall Klik View site atau dengan mengakses URL : http://localhost/workshop

Read More..

Install XAMPP, Apache, MySql, PHP

Untuk meng-install Joomla diperlukan :


PHP 4.2.x
atau diatasnya. download di http://www.php.net/
MYSQL 3.23.x
atau diatasnya. download di http://www.mysql.com/
Apache 1.13.19
atau diatasnya. download di http://www.apache.org/


Jika meng-install Joomla menggunakan jasa hosting (langsung online internet di hosting), didalam server host biasanya sudah terdapat PHP, MYSQL dan Apache sehingga kita tidak perlu menginstallnya lagi. Jika ingin membuat website di komputer pribadi terlebih dahulu dan bila sudah selesai baru di upload ke hosting, maka di komputer pribadi harus ter-install PHP, MYSQL dan Apache. untuk ini dapat dinstall program XAMPP, dimana didalamnya sudah terdapat PHP, MYSQL dan Apache.


Install XAMPP


Jalankan installer program paket XAMPP, download program xampp disini
Pastikan untuk meng-install semua service yang dibutuhkan oleh Joomla (PHP, MYSQL dan Apache).

Didalam Control panel XAMPP pastikan Apache dan MYSQL dalam kondisi running.
Untuk memastikan apakah local server sudah berjalan atau belum dalam browser ketik : localhost.

Untuk membuat website dalam local server atau komputer pribadi, file dan folder website harus ditempatkan di : C:\Program Files\xampp\htdocs

Read More..